 If you pay attention to the nutritional chart of your sliced bread, you’ll see that is packed with sugar, carbohydrates, and very little fibber. On top of that it has a bunch of preservatives to make it last longer and softer. Even when you go to a bakery, you get many of the things that you want to avoid in your bread. Most of it comes from the fact that bakeries are there to produces thousands of loafs of bread that need to be mixed, proofed, folded, and baked in a short amount of time. So if the baker does not claim to only use flour, yeast, salt, and water for the mix and that the bread is fermented, you should assume that bread is as unhealthy as the one you buy in a plastic bag in the supermarket. Please, don’t start arguing that you buy “whole wheat”, “X# of Grains”, “Organic”, etc., if they were not fermented, you are just eating sugar and a bunch of carbohydrates.
Even though the best bread you can eat is fermented sourdough, this post is dedicated to the humble “simple or rustic” bread. If you want to see step by step instructions on how to bake bread, visit Alex French Guy Cooking channel in YouTube (https://youtu.be/1r6jV-MaQuc) after reading my tips and corrections to his process.
What equipment do you need?
- Good Scale
- Large Measuring Cup – You should be able to measure more than 750ml at once.
- A Strong Mixer – Make sure your mixer has metal gears if you plan to mix a kilo (2.2lbs) of bread.
- Large Dutch Oven – This is a must!
- Large Metal Bowls (Plastic are OK too). A bannetton
Ingredients:
- Bread Flour – Look for ORGANIC STONE GROUND flour. This is the key to eat good nutritious bread.
- Yeast – If you live in high humidity environment (i.e. Florida, Gulf States, Caribbean, Central America, etc.), go with dry active yeast. If you live in a drier climate, you should use live yeast.
- Salt – Kosher salt is best.
- Distilled or Spring Water – Avoid using tap water since the chlorine in it will inhibit the yeast activation.
- Sugar – *** This is not required, but a little bit of sugar will turbo charge the yeast activation!
Amounts:
The amounts listed her are for preparing a kilo (2.2lbs) of dough. If you would like to prepare 1/2 kilo (1lbs), just adjust the ratios accordingly.
- Bread Flour – 1Kg (2.2lbs)
- Yeast – 15 grams (when using dry active yeast)
- Salt – 18 grams
- Water – 650ml **This will make your dough 65% hydrated. It will make it easy to handle and not too sticky. You could go up to 85% hydration, but be aware that the dough will be super sticky and difficult to handle. I would recommend you try higher hydration levels once you have baked a couple of loafs! Here is a great video on how to handle high hydration dough for those of you more daring. https://youtu.be/vEG1BjWroT0
Procedure & Tips:
- In the mixing bowl combine the flour and salt.
- Measure 650ml of water and warm it to 105 degrees.
TIP: You can get the water up to temp by heating it in the microwave for 1 minute. Make sure you do not heat the water pass 115 degrees, because it will KILL the yeast
- Dissolve the yeast in the warm water by gently wisking it and let it activate for 10 minutes or until you see a lot of bubble on the surface.
TIP: Put a teaspoon of sugar into the yeast mix to turbo charge its activation!
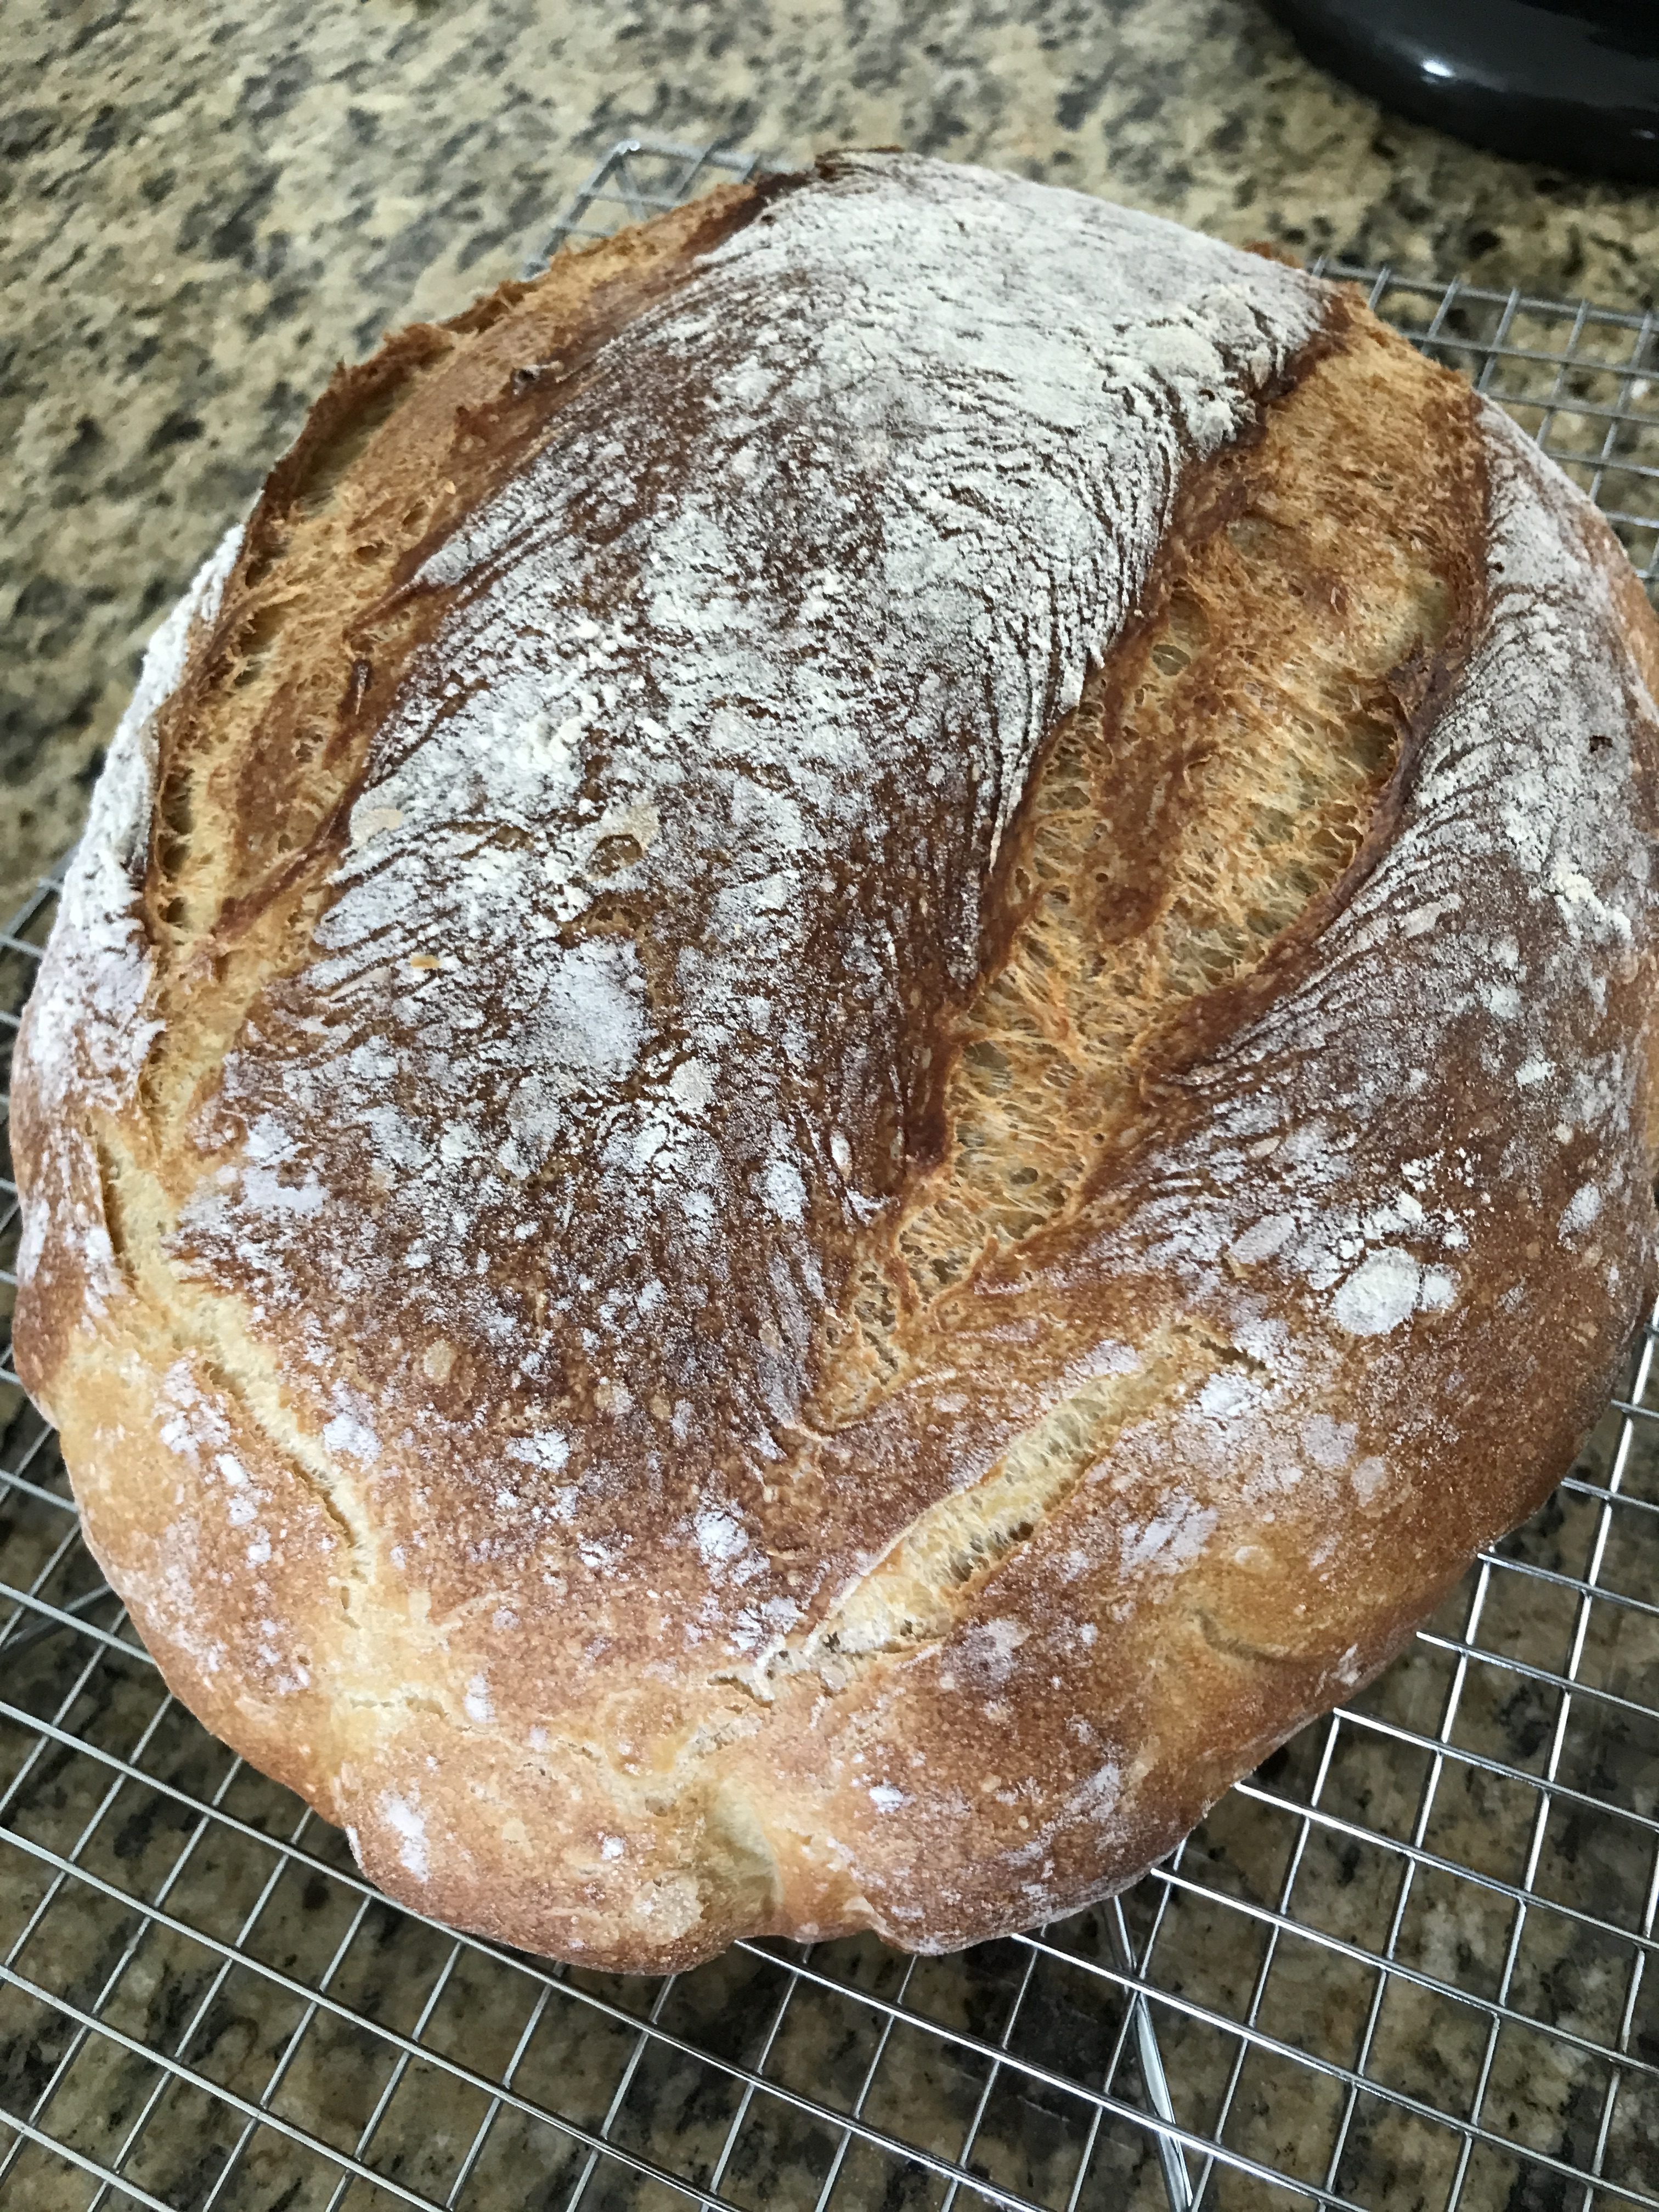
- Turn you mixer in the “mix” setting to completely mix the flour and salt.
- Once the flour and salt have been completely mixed (about a minute), add the water/yeast mix (after it has been fully activated) and continue in “mix” until fully incorporated into the dry mix.
TIP: Use a rubber spatula to scrape the sides of the bowl and make sure that all dry indigents are fully incorporated.
- Once all ingredients have been incorporated, turn you mixer to the next speed up and mix for 4 to 5 minutes. This is a lot shorter than what Alex recommends in his video. But it will make your mix a softer and airy.
- Transfer the dough mix to a bowl that you can tightly cover to let it proof in the dark warm place for up to 3 hours or until it has DOUBLE in size (if you are in warm humid climate, this will happen in 1 hour). When working with higher hydration dough you’ll have to extend this time to 4 hours. If you do not have a cover for you proofing bowl, lightly wet the edge of the bowl and cover with saran rap.
TIP: If you want the dough to come out of the bowl easily, put a lite coat of grape seed oil on the bowl before transferring the dough. I cannot emphasize enough that it should be a LITE coating. A little bit of oil on a paper towel should be more than enough to oil your bowl! DO NOT use olive oil since it will add unwanted flavors to your dough.

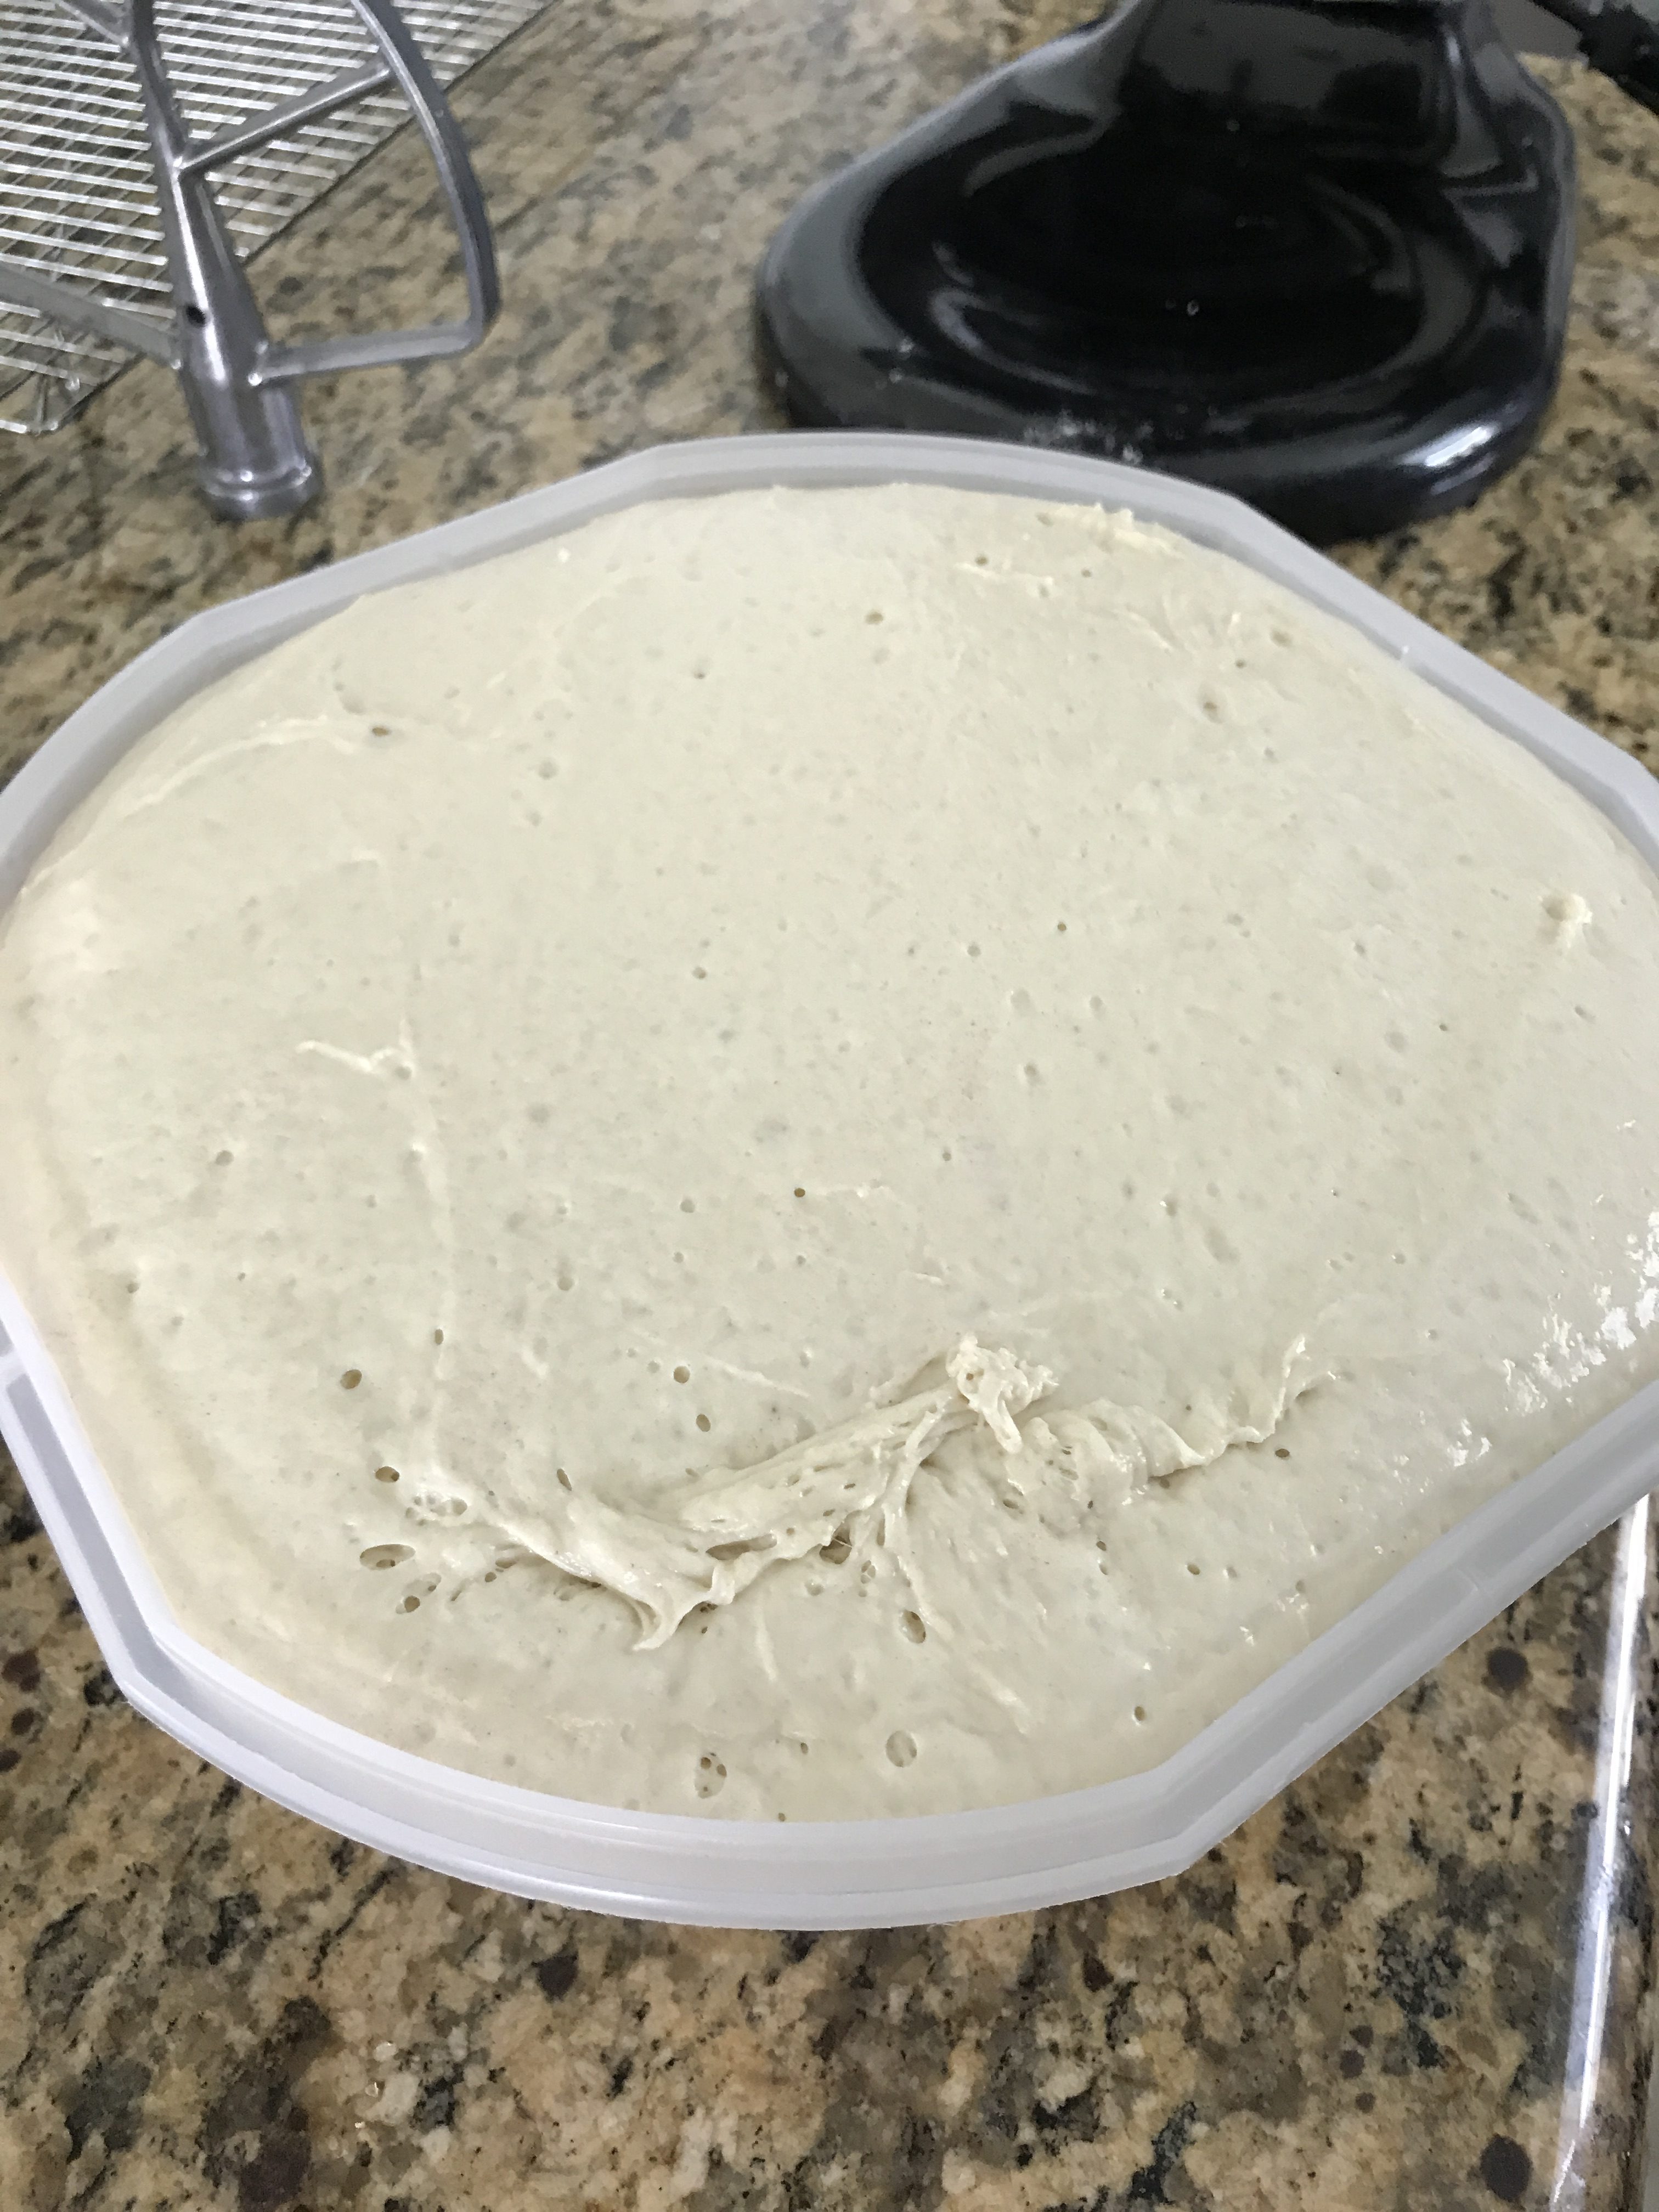
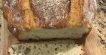
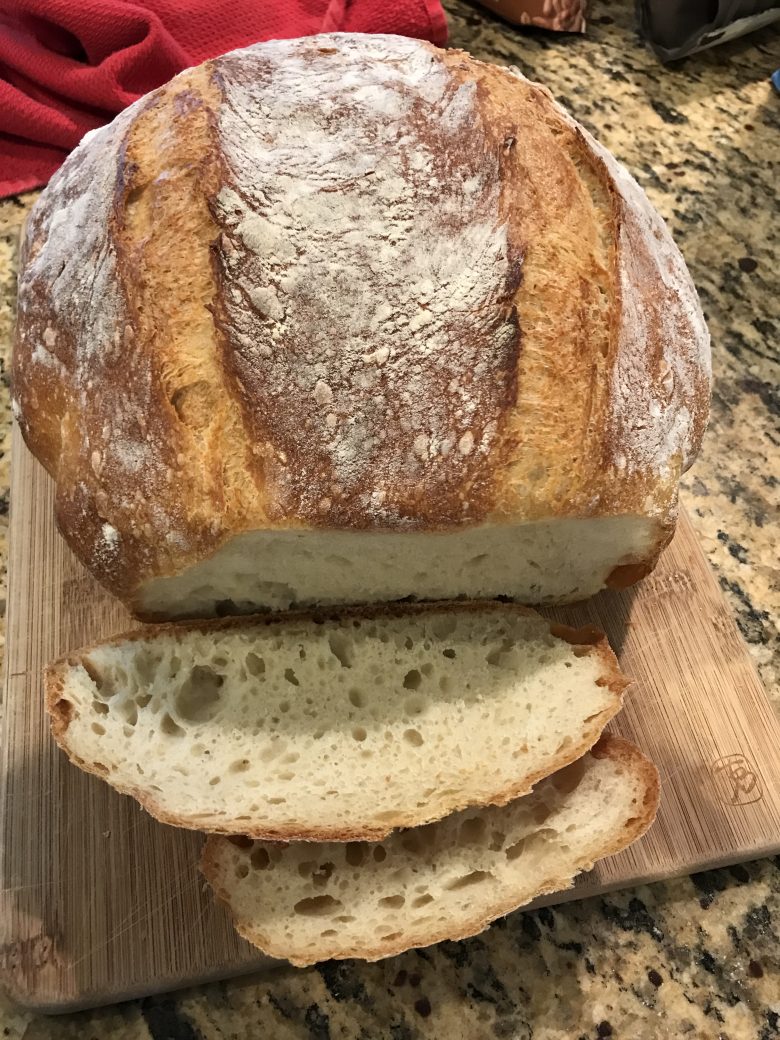
- At the end of the first proofing, dump your dough on a lightly dusted non-porous surface to fold and shape (please see Alex’ video). Once you have shaped your dough let it proof in a clean bowl for 30 to 60 minutes. It should have risen to almost double its original size and it surface should have the elasticity to fix light dimples that you would press with a finger.
TIP: While letting your dough proof for the second time, start preheating your dutch oven in the oven at 480 degree Fahrenheit.

- Transfer proofed dough to dutch oven and create some slits on the top surface. Bake covered for 30 minutes at 480 degrees. After 30 minutes, uncover the dutch oven and bake at 450 degrees for another 20 minutes or until the internal temperature reaches 200 degrees.
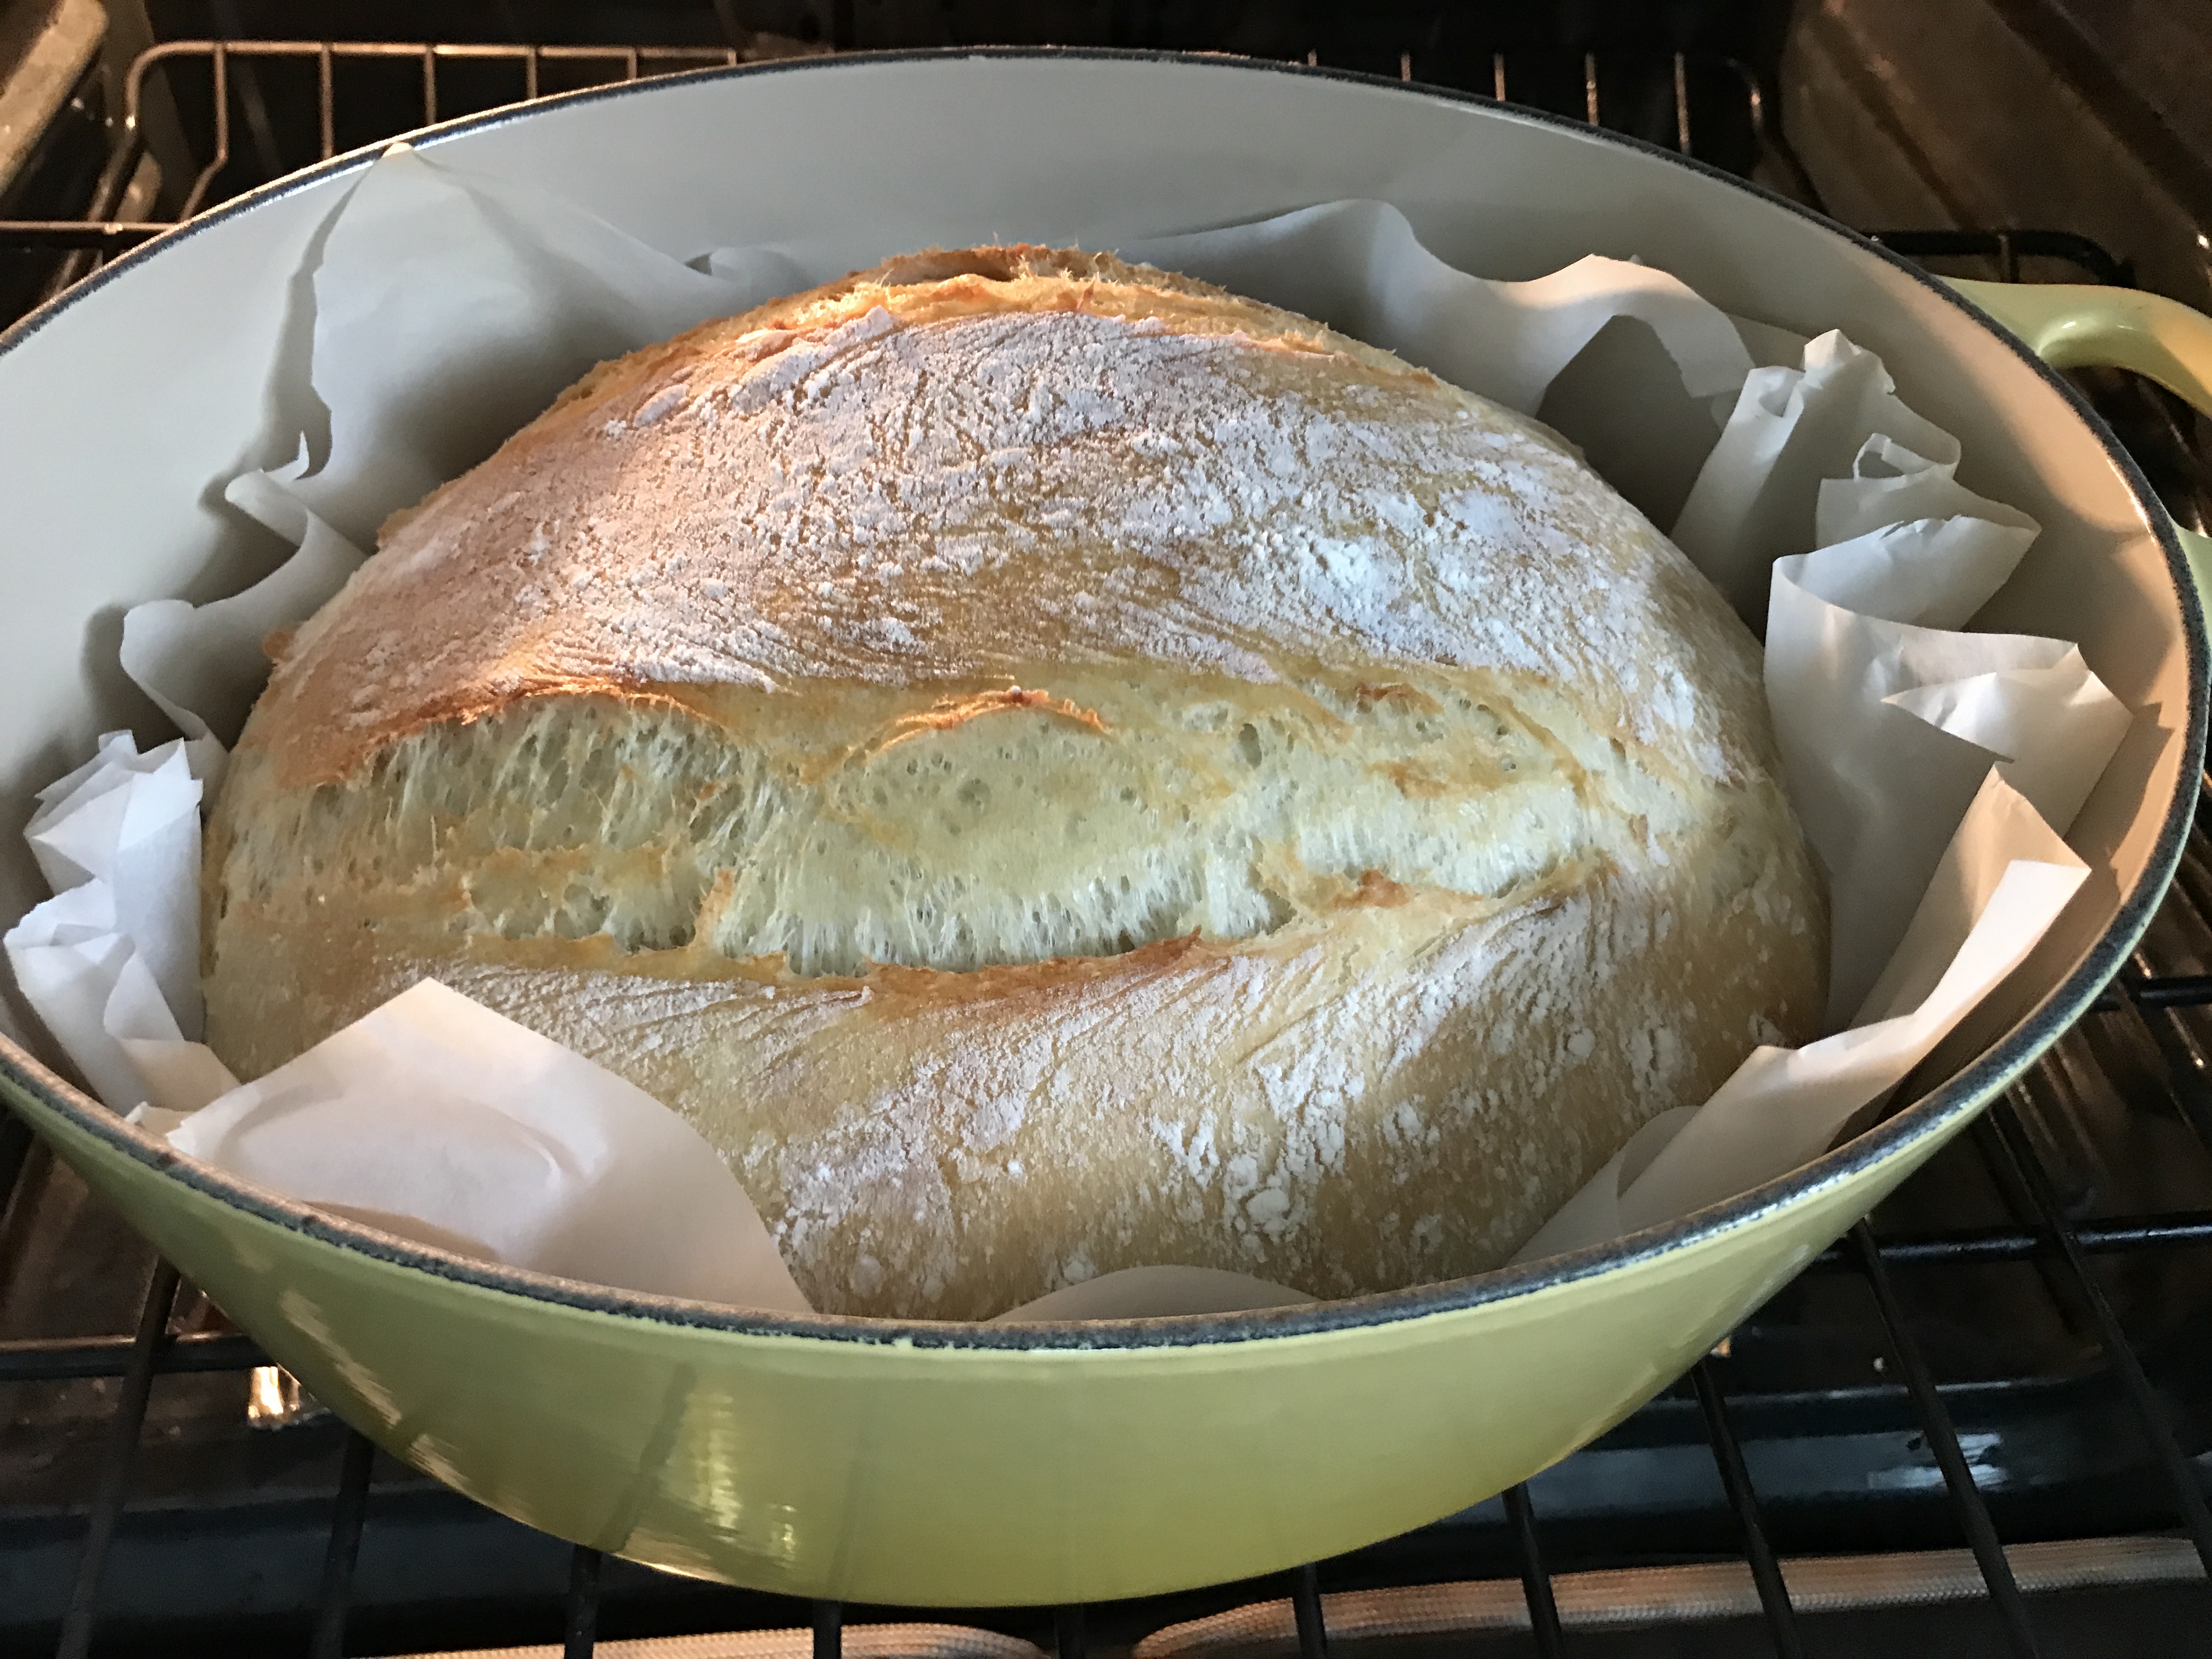
- Set you loaf on a cooling rack for two hours or until completely cool.
Resist the temptation to cut into it before it has cooled. Remember, you baked a natural bread… no preservatives or chemicals… just wholesome goodness. So enjoy it!